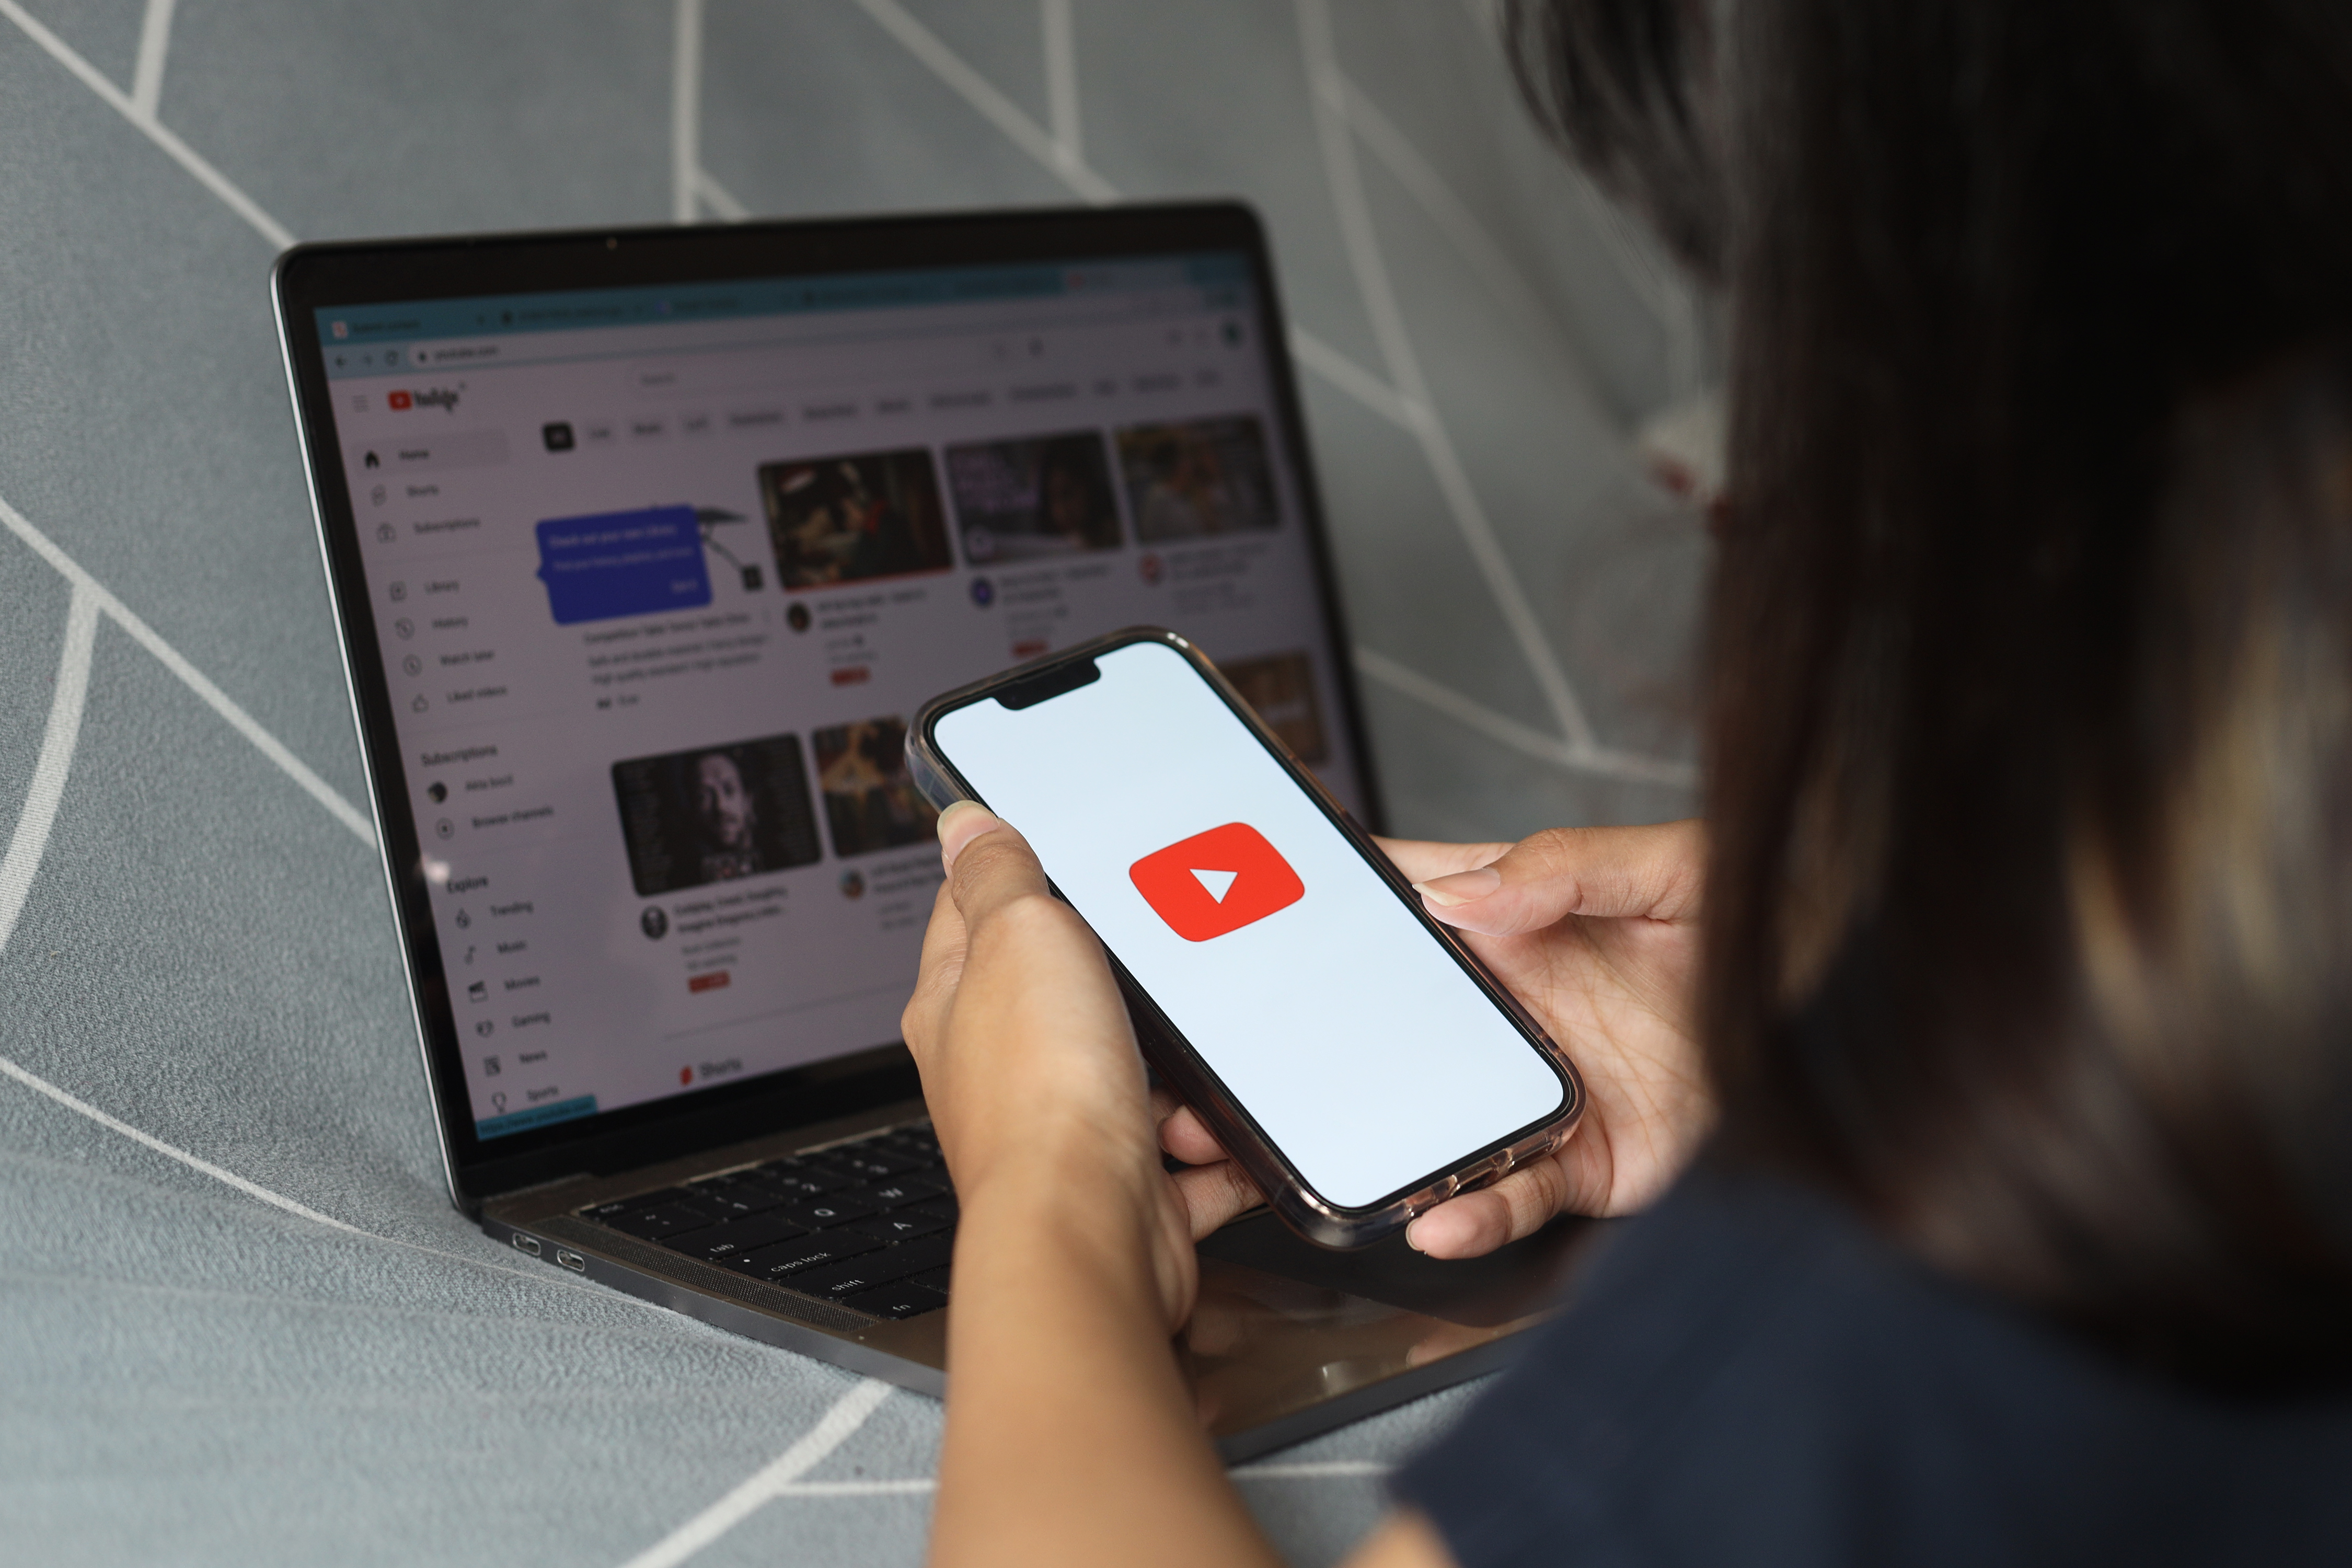
Starting your YouTube journey? You’re in the right place.
Whether you’re launching a new passion project, building your personal brand, or just exploring creative expression, starting a YouTube channel can be one of the most rewarding things you do this year. This beginner’s guide to starting a YouTube channel will walk you through how to create a YouTube channel step by step — with no tech jargon, no stress, and no experience required.
If you’ve ever said to yourself:
- “I have no idea where to start.”
- “What’s the right channel art size?”
- “How do I even sign in?”
Don’t worry — we’ve got you. Let’s walk through how to set up a YouTube channel for beginners the right way — one click at a time.
Table of Contents
-
Create a Google Account
-
Sign in to YouTube
-
Create Your YouTube Channel
-
Choose a Channel Name
-
Add a Profile Picture
-
Upload Channel Banner Art
-
Access YouTube Studio
-
Preview Uploading Your First Video
-
Quick Start Checklist
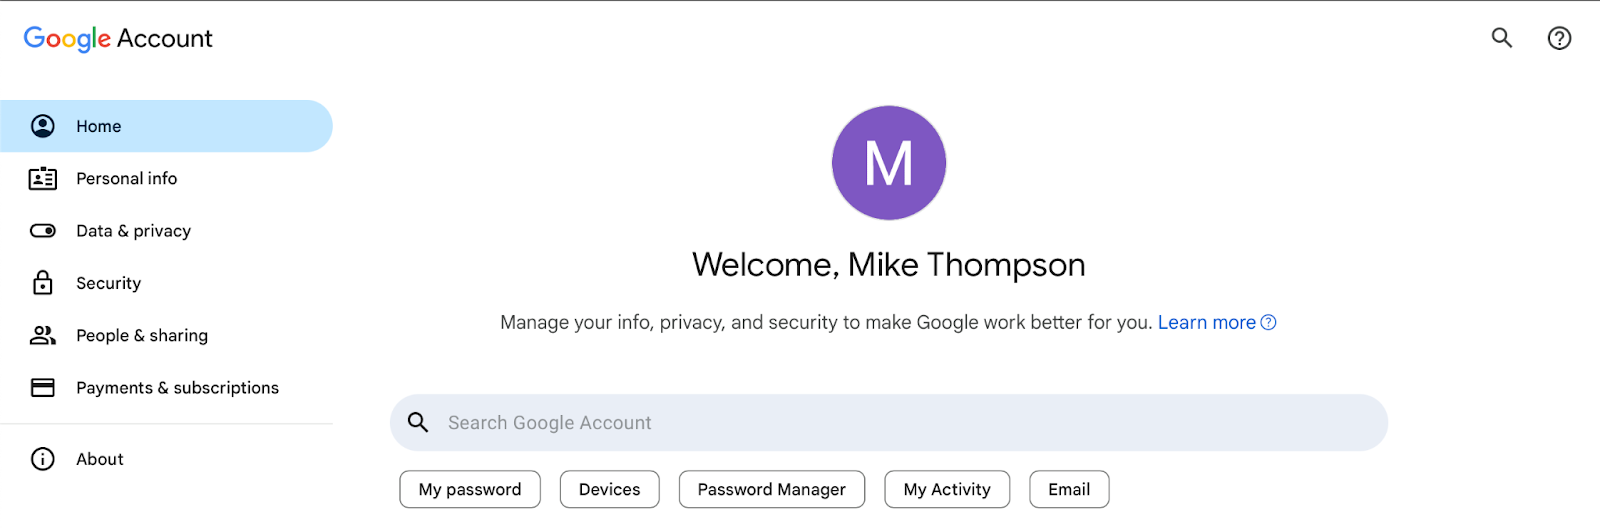
Step 1: Create a Google Account (Gmail)
Before you can create a YouTube channel, you’ll need a Google Account. If you already have one, feel free to skip to Step 2. If not, here’s how to make one:
- Go to accounts.google.com/signup
- Fill out the form with your first name, last name, username, and password
- Follow the prompts to verify your account with a phone number or email
- Agree to the terms and privacy policy
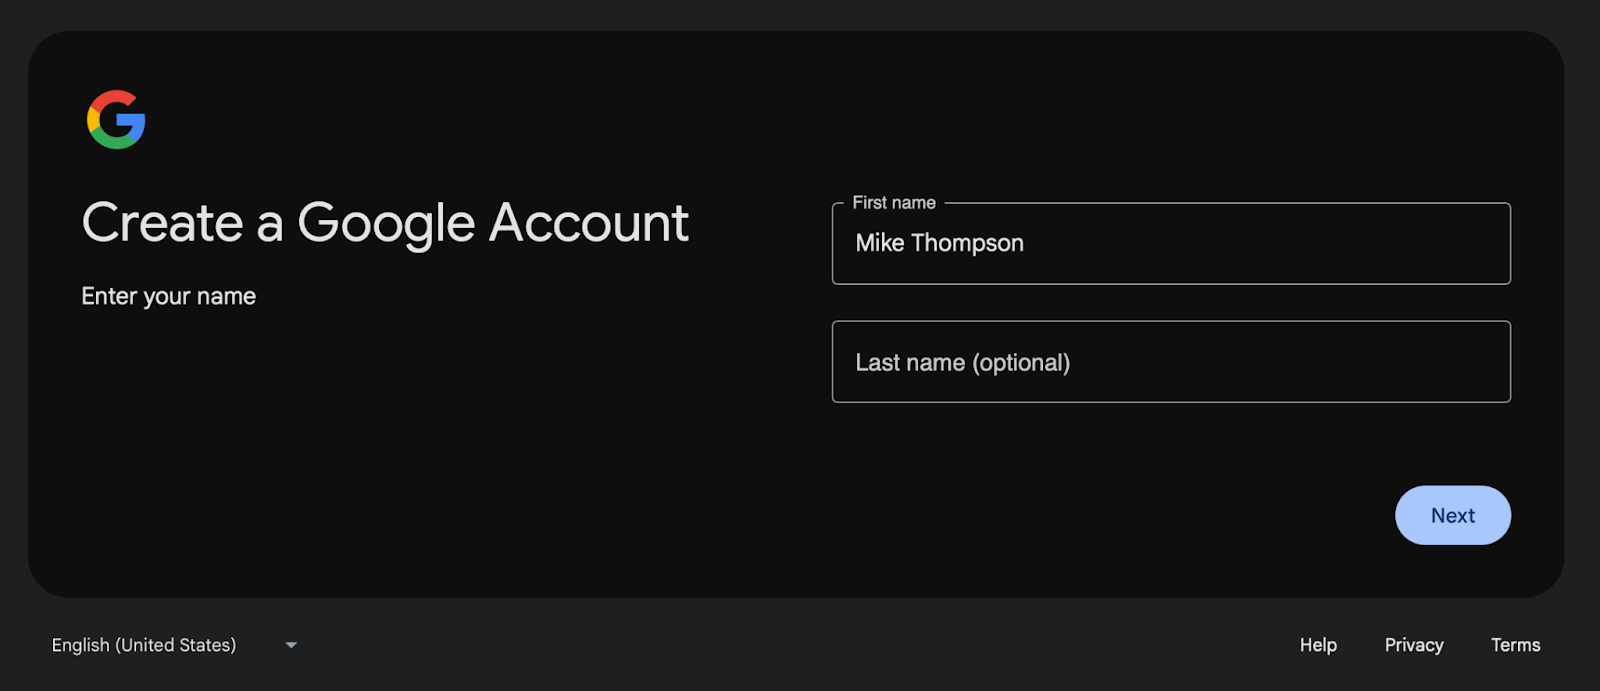
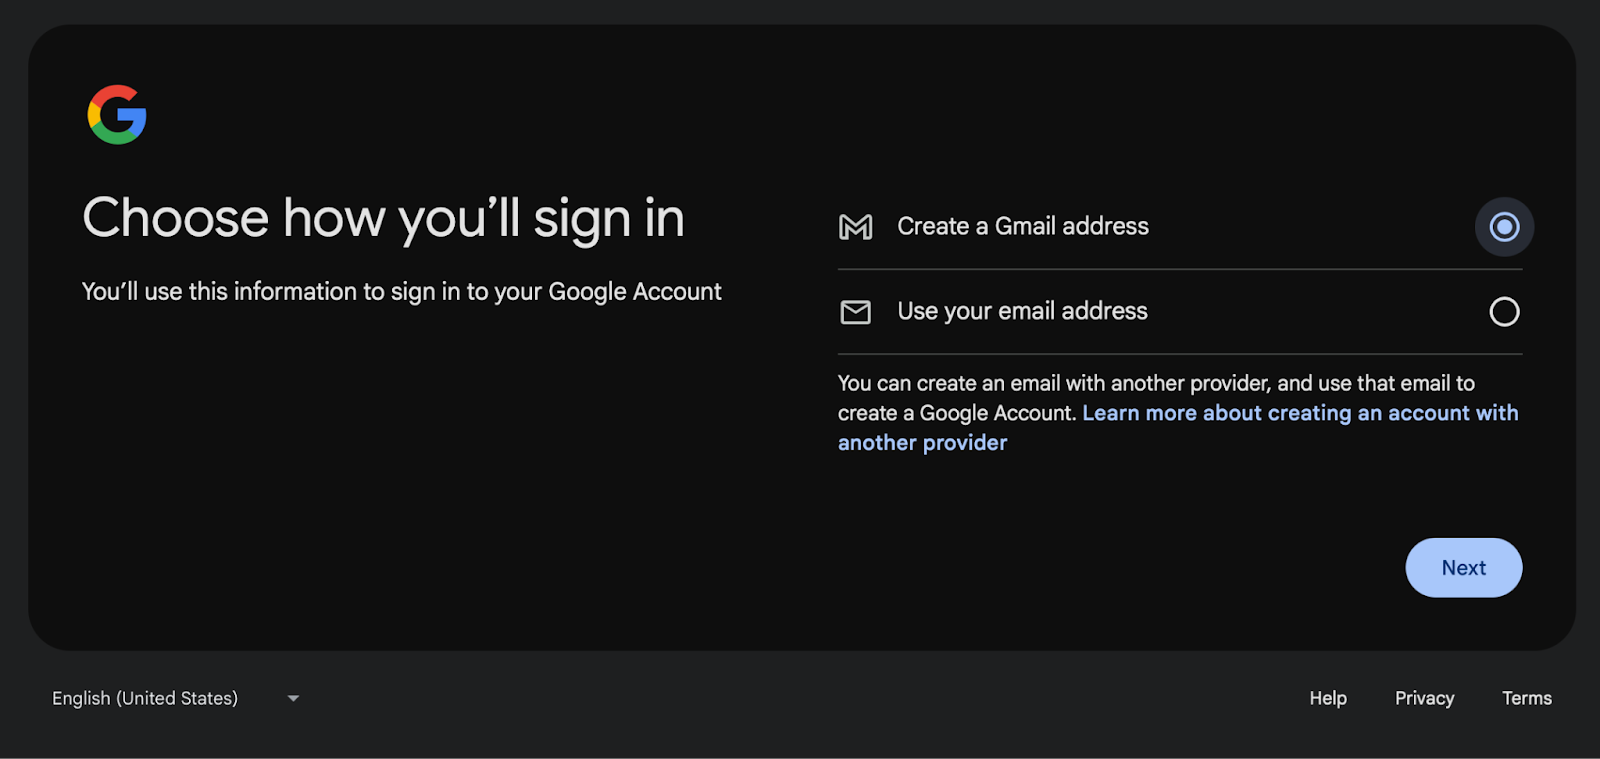
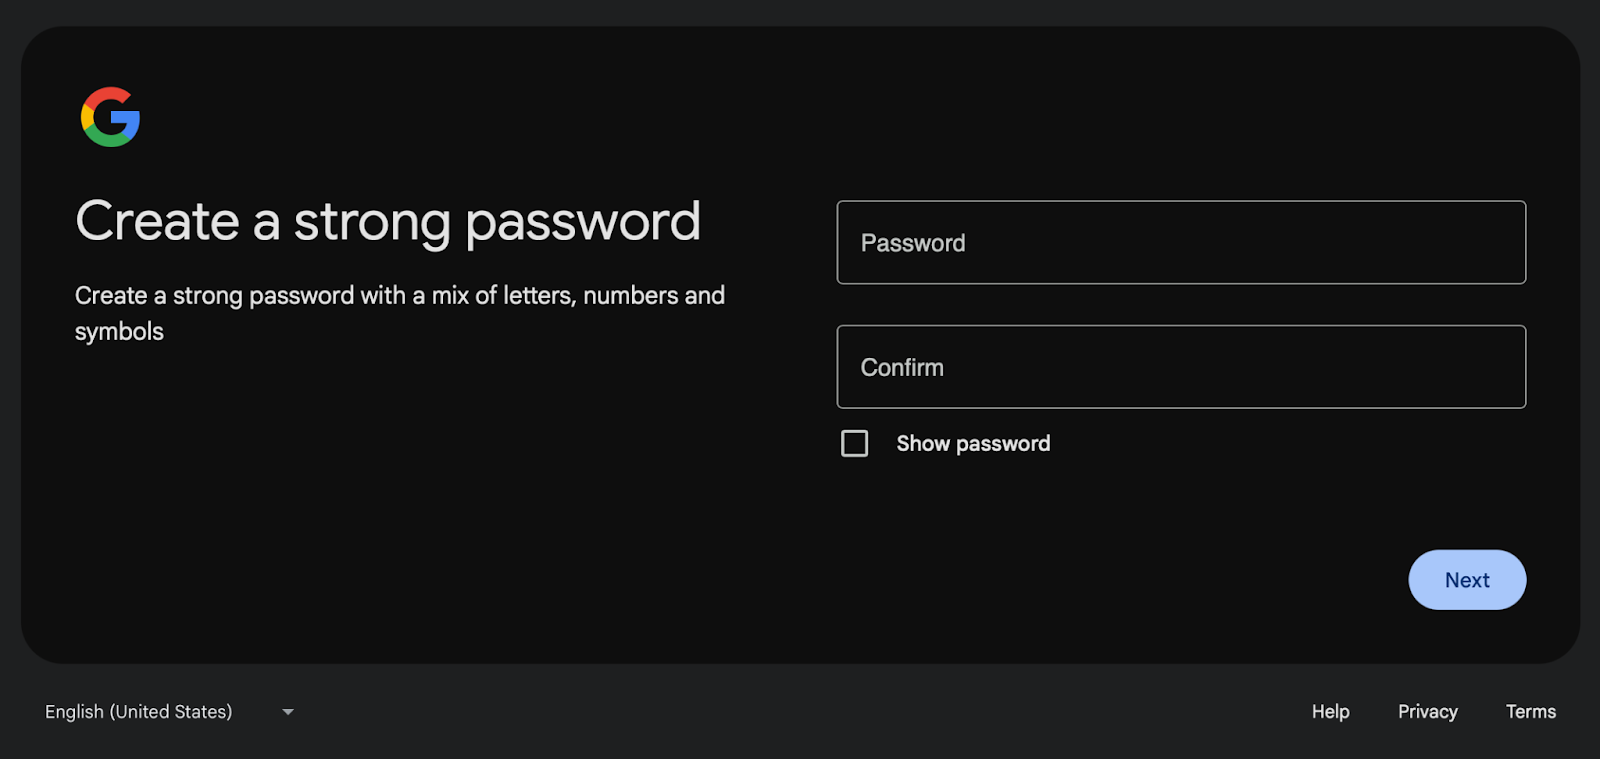
Once done, you now have a Gmail/Google Account — which is your key to unlocking YouTube.
Screenshot:
Step 2: Go to YouTube and Sign In
Now that you have a Google account, it’s time to sign in to YouTube.
- Visit youtube.com
- Click the Sign In button in the top right corner
- Enter your Gmail address and password
- You’ll now be logged in to YouTube using your Google account
📸 Screenshot:

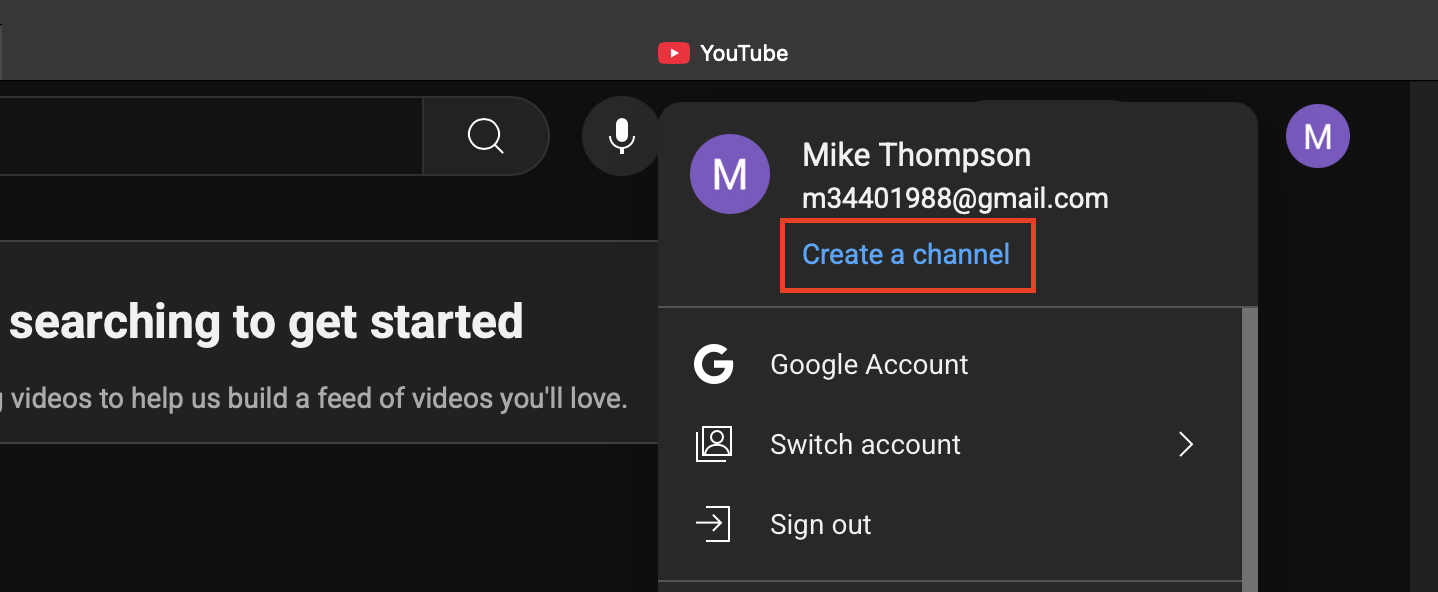
Step 3: Create Your YouTube Channel
This is where the magic starts!
- Click your profile icon in the top right corner of the YouTube homepage
- Select “Create a channel”
- You’ll be prompted to choose a name and image (don’t worry, you can change these later)
- Click Create Channel
Congratulations — you now officially have a YouTube channel!
Screenshot:
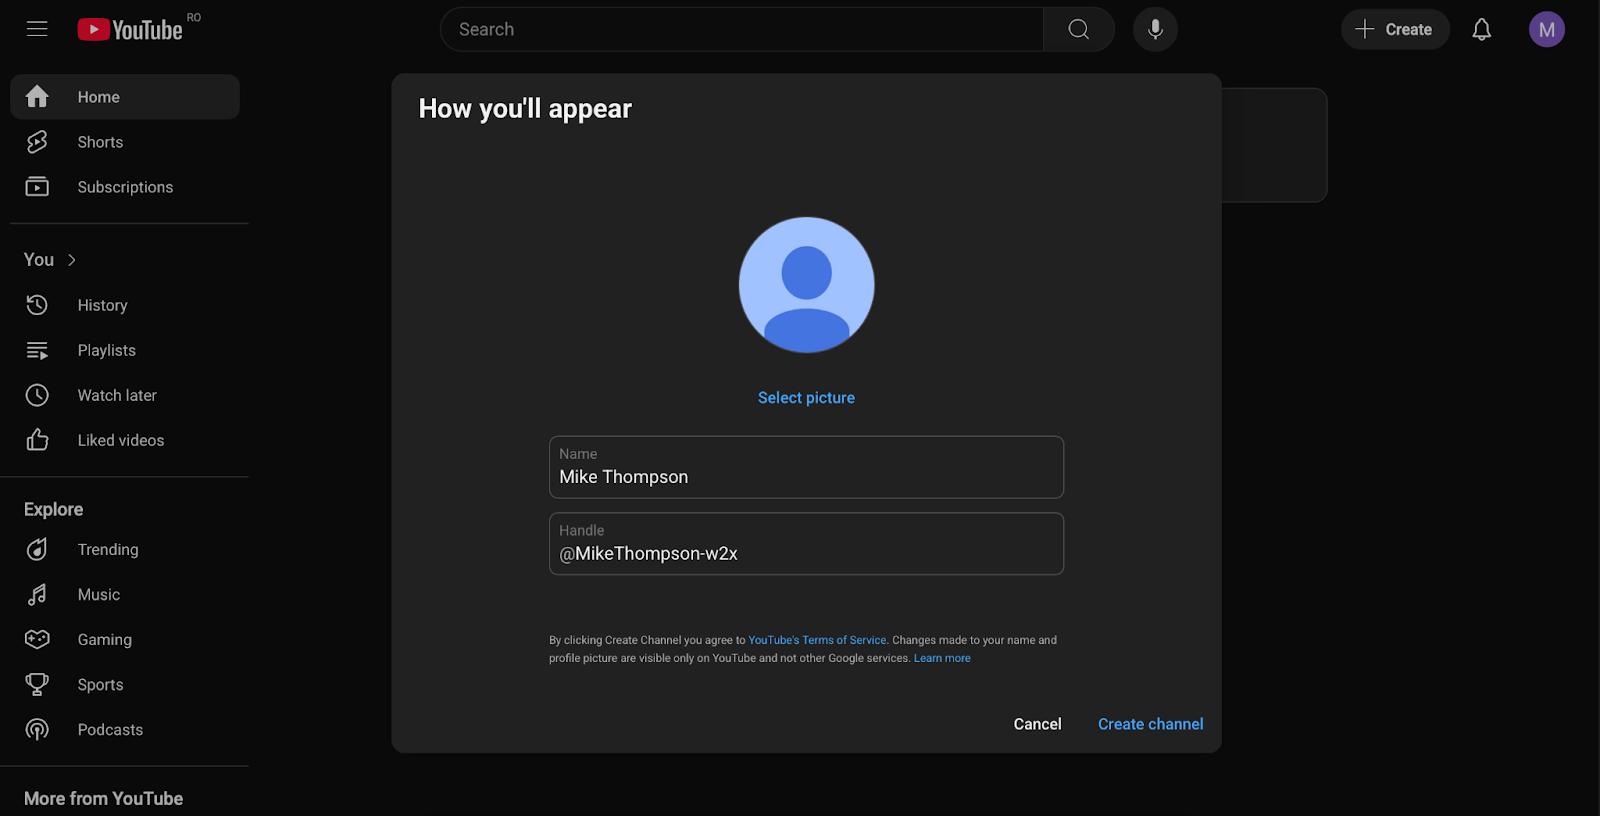
Step 4: Choose Your Channel Name
Your channel name is how people will recognize you — make it clear and memorable.
Tips for picking a great channel name:
- Keep it simple and easy to spell
- Make it relevant to your content (e.g., “TravelWithTina” or “TechTalksDaily”)
- Avoid names that are already taken (search on YouTube first)
- You can use your real name or a creative brand name
Screenshot:
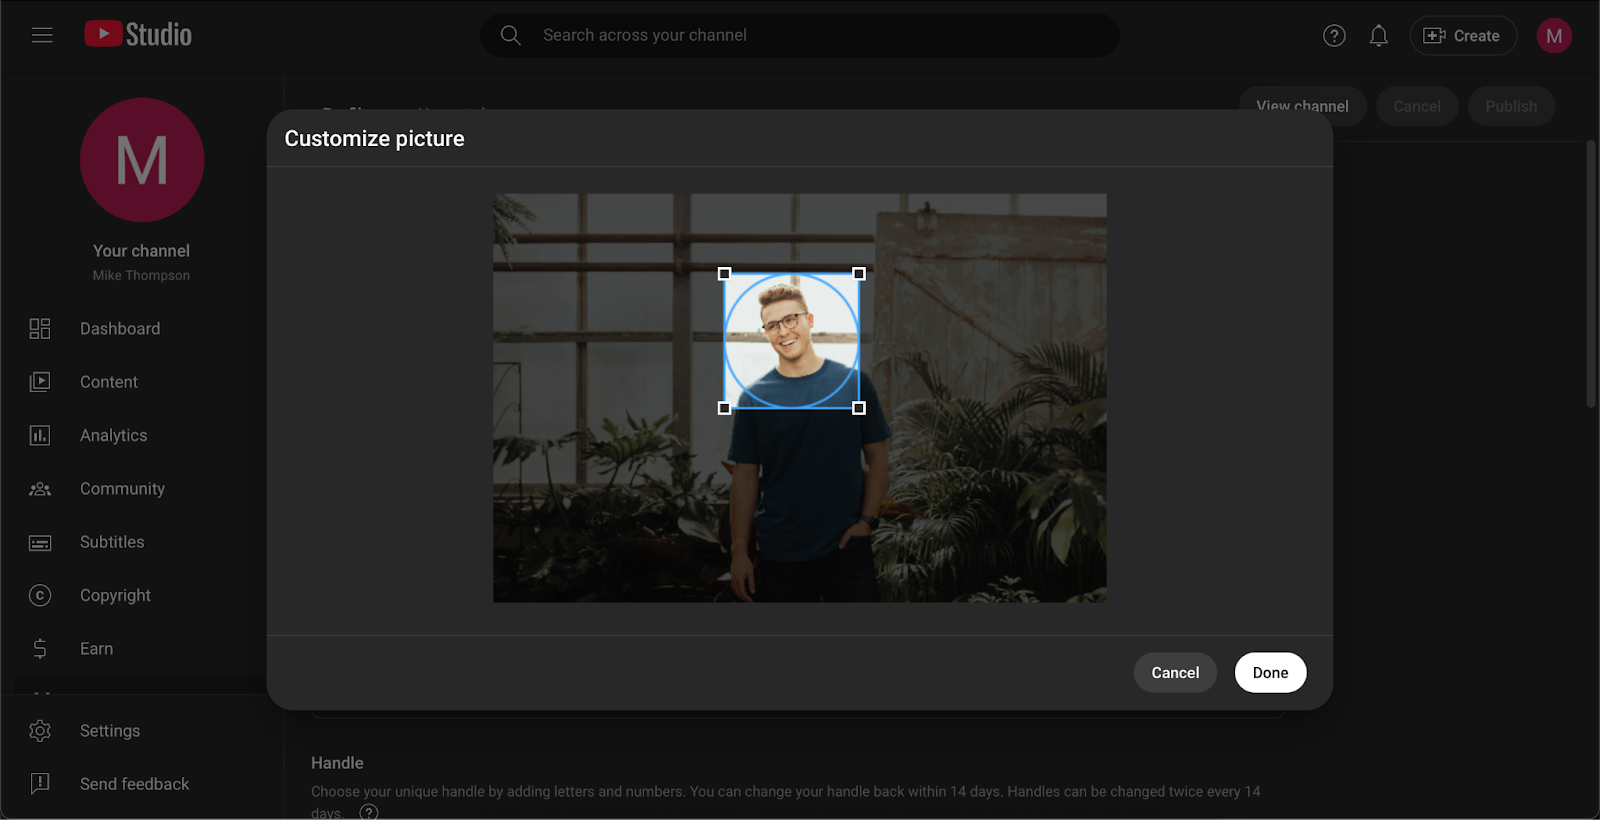
Step 5: Add a Profile Picture
Let’s personalize your channel with a profile picture.
- From your channel homepage, click “Customize Channel”
- Go to the Branding tab
- Upload a square image — ideally 800 x 800 pixels
Ideas for your profile picture:
- A clear headshot of you
- Your logo if you’re building a brand
- An eye-catching symbol or icon
Screenshot:
Step 6: Upload a Channel Banner (Channel Art)
Your channel banner is the large image at the top of your YouTube page. It’s your first impression — make it count.
Channel art size specs:
- Recommended size: 2560 x 1440 pixels
- Safe area (text/logo): 1546 x 423 pixels (centered)
Pro tip: Use Canva.com and search for “YouTube Channel Art” — it has free templates sized perfectly for YouTube.
Screenshot:
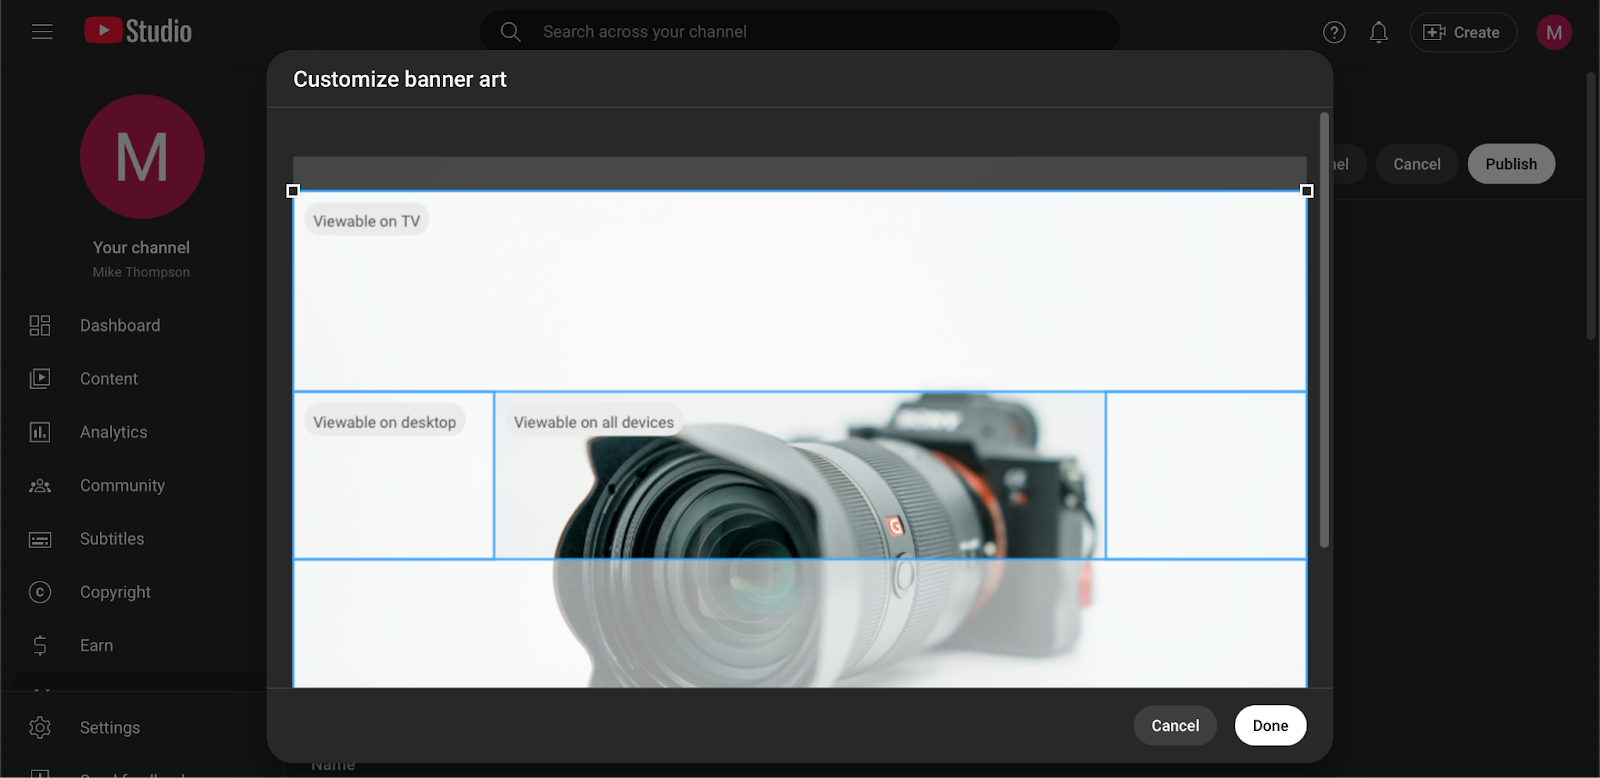
YouTube Help: Channel Art Specs
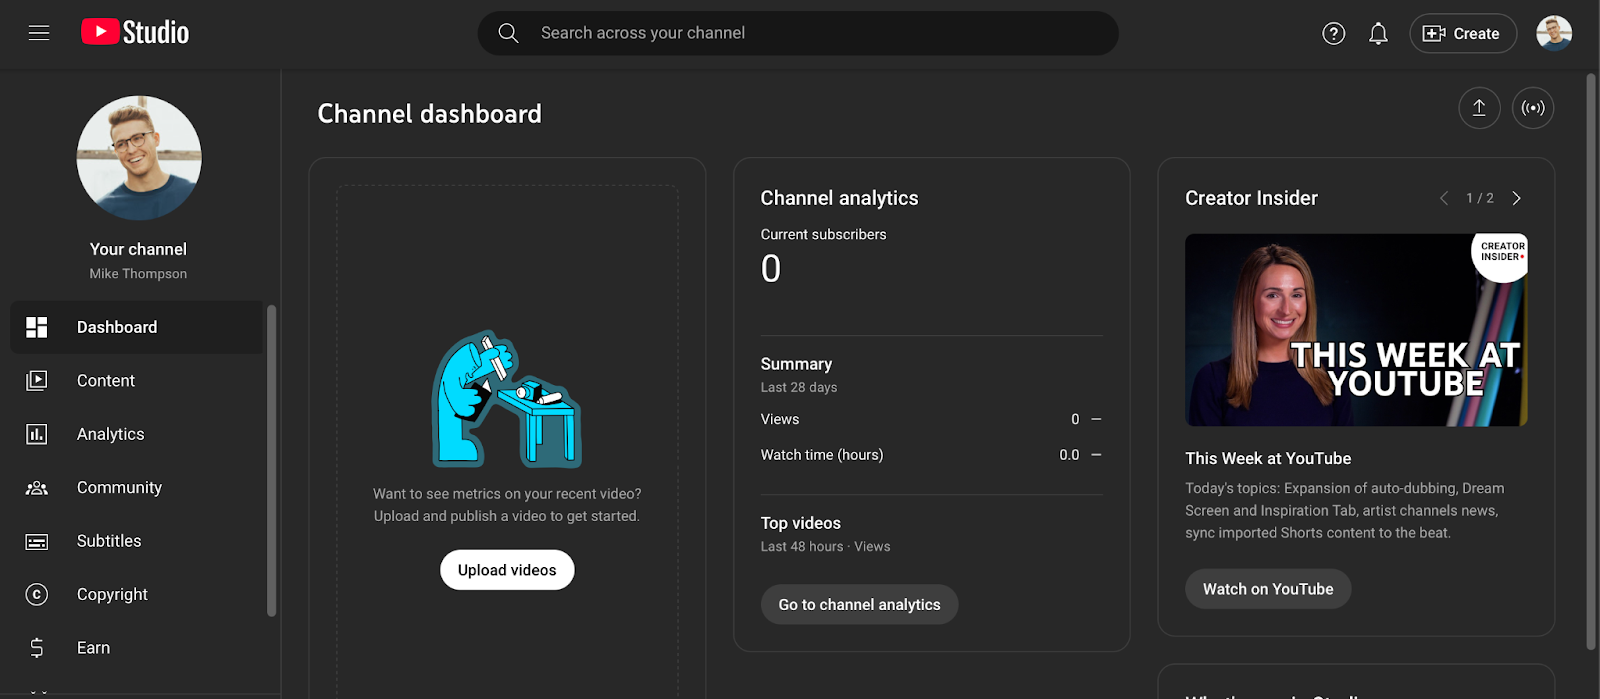
Step 7: Access YouTube Studio
YouTube Studio is your control center — where you’ll manage videos, view analytics, and customize your channel.
- Click your profile icon (top right)
- Select YouTube Studio
- Explore tabs like Content, Analytics, Customization, and Settings
This is where you’ll upload videos, track performance, and make updates as your channel grows.
📸 Screenshot:
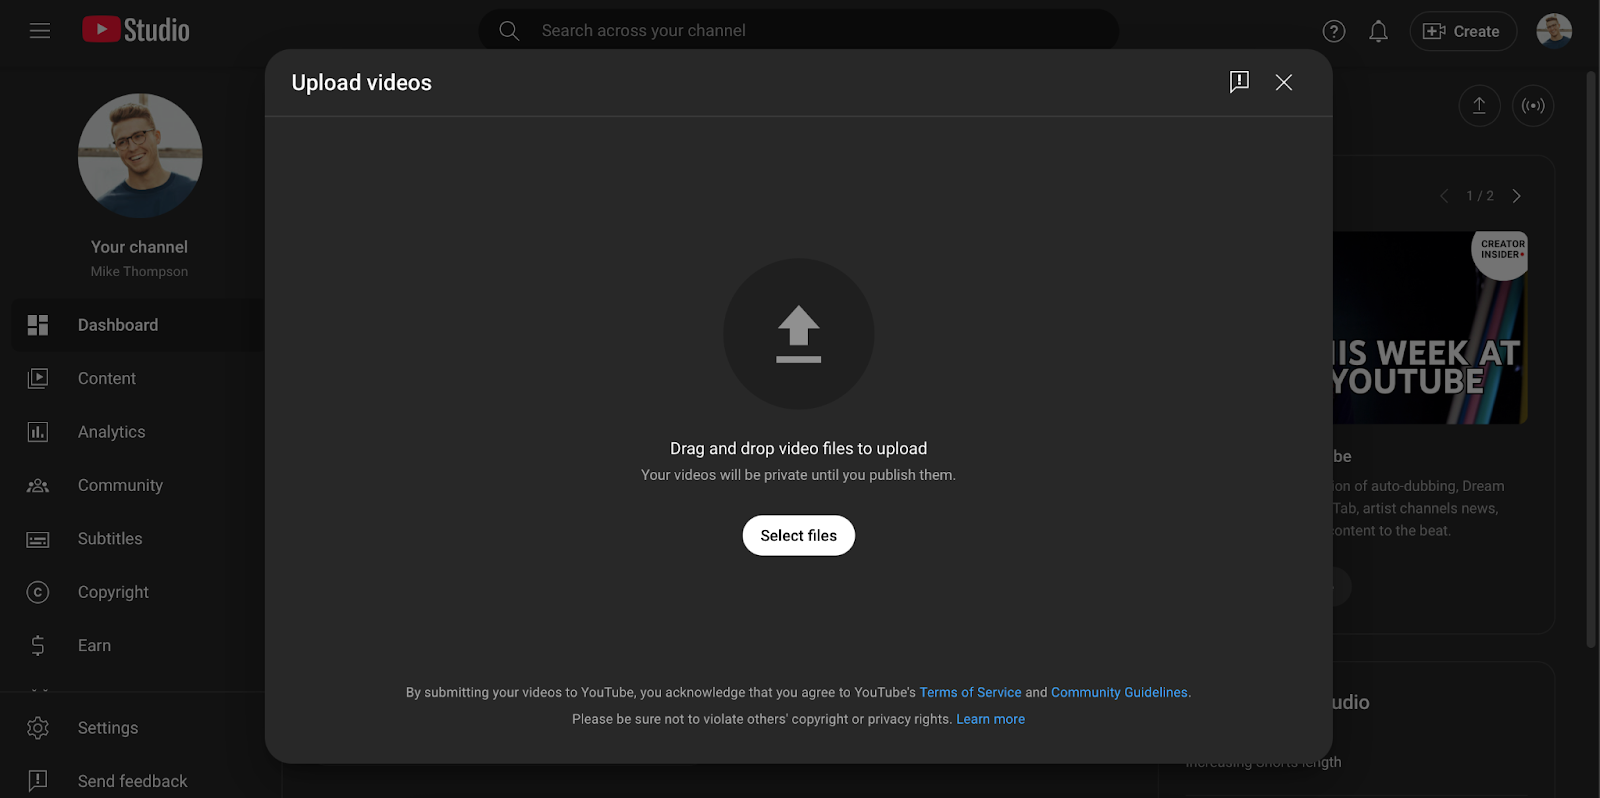
Step 8: Upload Your First Video (Optional Preview)
You don’t need to upload a video right away, but if you’re ready, here’s a quick preview of how to do it:
- Click the camera icon with a + in the top right (it says “Create”)
- Select “Upload video”
- Choose your video file and follow the on-screen steps
We’ll cover video uploading in detail in a future guide, but now you know where to go when you’re ready.
Screenshot:
You Did It! What’s Next?
And just like that — your YouTube channel is live!
You’ve now learned:
- How to start a YouTube channel step by step
- How to set up a YouTube channel for beginners
- What the channel art size is and how to design it
- Where to find tools like YouTube Studio to grow your channel
Quick Start Checklist Summary
If you just want the essentials, here's your quick checklist:
- Create a Gmail/Google Account (if you don't already have one)
- Sign in to YouTube
- Create your YouTube channel
- Choose a memorable channel name
- Upload a profile picture (800 x 800 px)
- Upload channel banner (2560 x 1440 px, wife safe area)
- Open YouTube Studio (explore settings to get familiar)
- Prepare and upload your first video
This is just the beginning of your journey. As you move forward, remember: done is better than perfect. Don’t wait until everything’s “ready” — start creating and let your voice grow along the way.
YouTube for beginners doesn’t have to be overwhelming — especially with the right steps and support. You’ve got this!